
API Tokens
The API Tokens page provides access to token-based authentication for a selected merchant entity within the Account Tree. Tokens are used to authenticate API requests and enable transaction processing.
API tokens are managed at the Merchant level and apply to all channels associated with that entity. Multiple tokens can be active simultaneously, allowing flexible integration and migration scenarios.
Tokens are commonly used in server-to-server integrations and must be handled securely in accordance with your system architecture.
API Tokens
API Tokens are used to access the Merchant Portal API and process transactions. Each token is associated with a specific merchant entity and can be used for all channels available under it.
Token handling is designed to meet PCI compliance requirements. For security reasons, token values are masked after creation and cannot be retrieved again.
The API Tokens section lists all tokens currently available for the selected merchant. Additional attributes such as creation date and usage details may be available to support lifecycle management.
Each token is tied to a specific merchant entity context. If you switch the selected entity in the Account Tree, only tokens belonging to that entity are displayed.
Where to find this screen
- In the left navigation menu, select Admin → Account.
- Select the ENTITY tab.
- Select a Merchant in the Account Tree.
- Locate the API Tokens section within Entity Management.
The displayed tokens depend on the currently selected merchant entity.
Figure 1: API Tokens – merchant-level token management
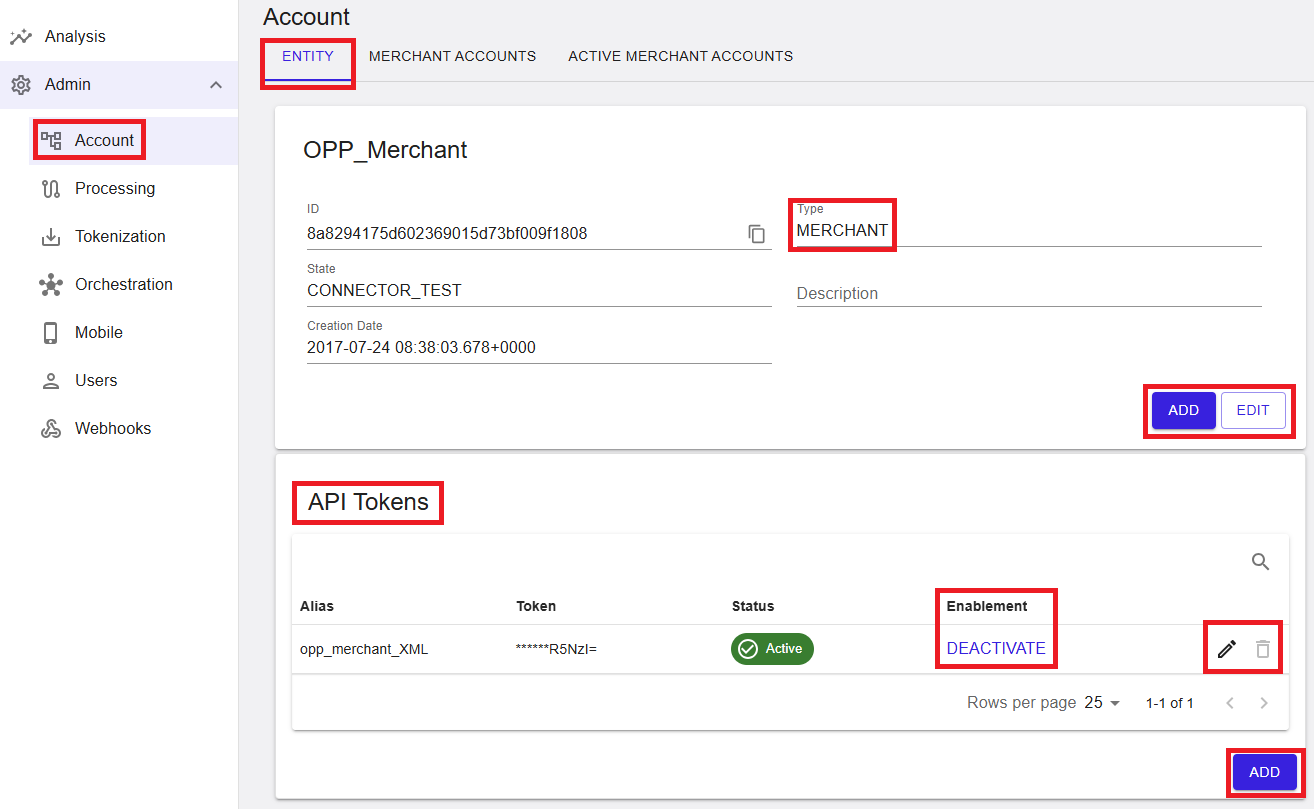
What you see in the table
- Alias – A descriptive name for the token.
- Token – The token value (masked for security).
- Status – Indicates whether the token is active.
- Enablement – Available action (for example, Deactivate).
Add API Token
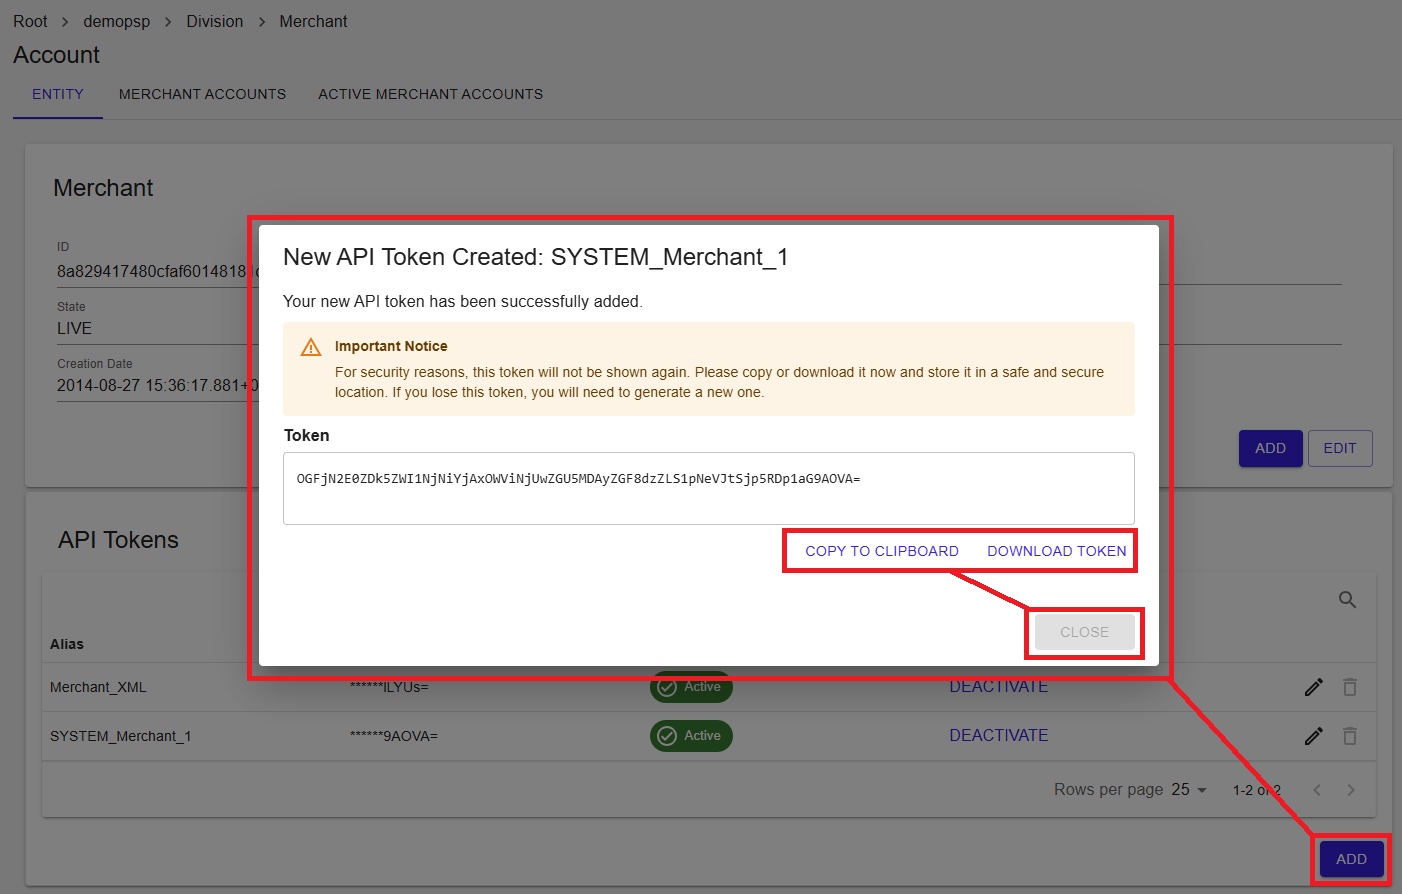
To create a new token, click the Add button. A dialog displays the generated token.
⚠️ Important: The token is only visible at the time of creation. You must copy or download it immediately. This behavior is required for security and PCI compliance.
When downloading a token, the file name may include the associated entity ID, making it easier to identify which merchant the token belongs to.
If a token is lost, it cannot be retrieved. A new token must be generated and used instead.
Multiple tokens can be maintained at the same time, allowing safe key rotation and uninterrupted operation.
Figure 2: New API Token created
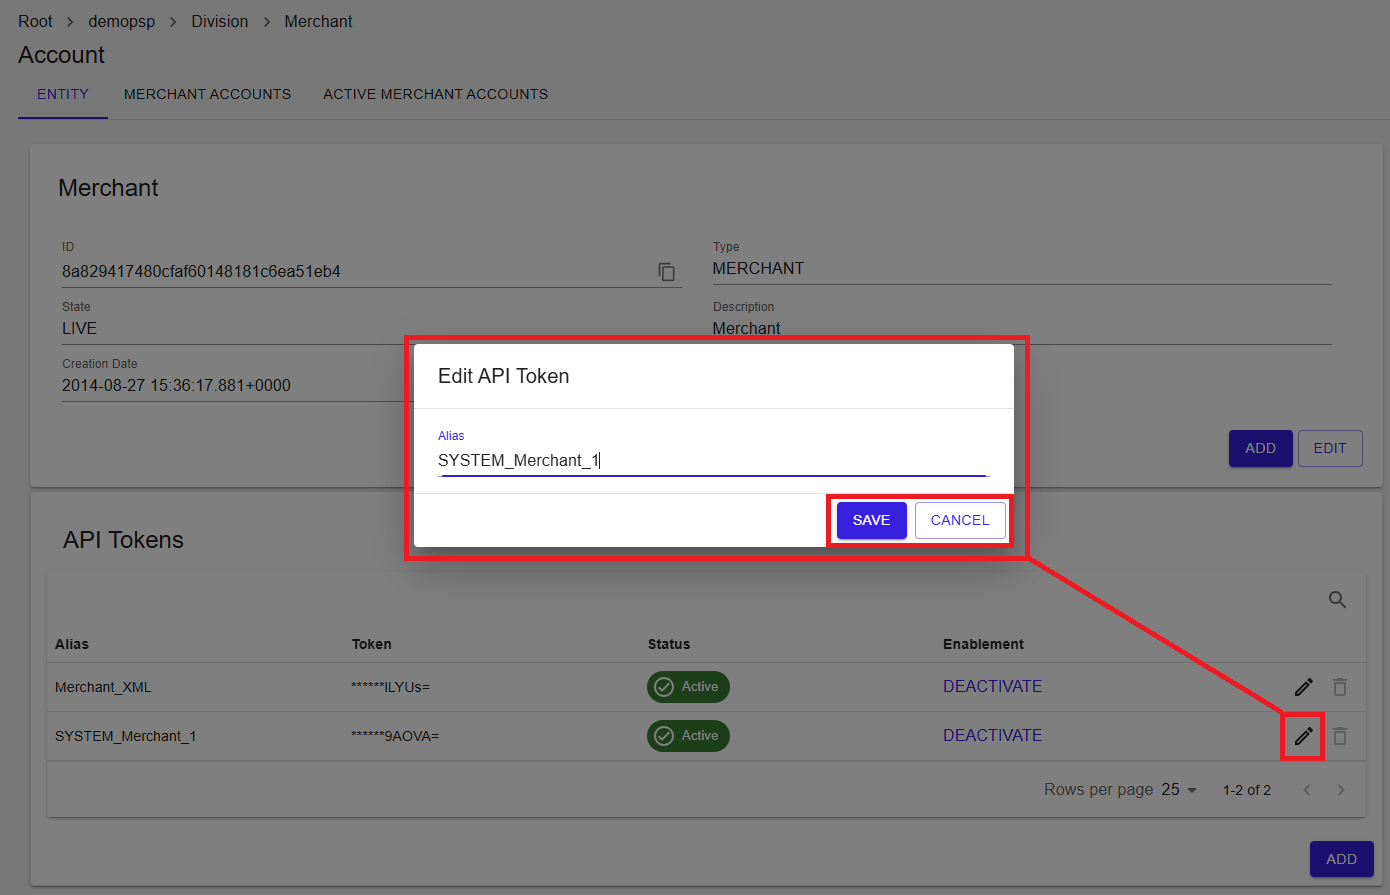
Edit API Token
To update a token, click Edit. Only the alias (display name) can be modified.
Figure 3: Edit API Token
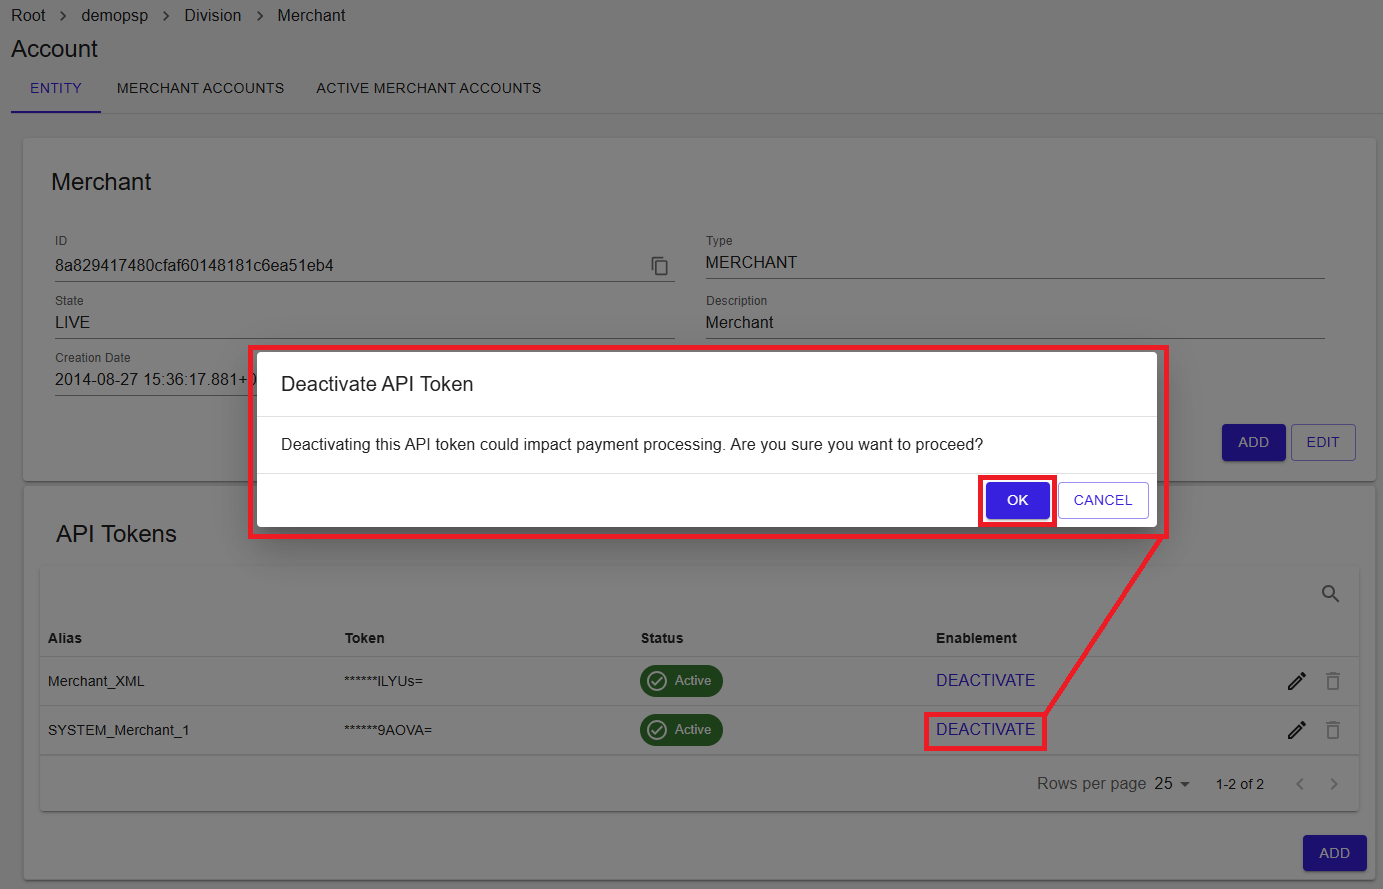
Deactivate API Tokens
To deactivate a token, click Deactivate.
Deactivating a token immediately prevents it from being used for transaction processing.
This action is reversible. A deactivated token can be reactivated if needed.
⚠️ A confirmation dialog is displayed, as this action may impact active integrations.
Figure 4: Deactivate API Token
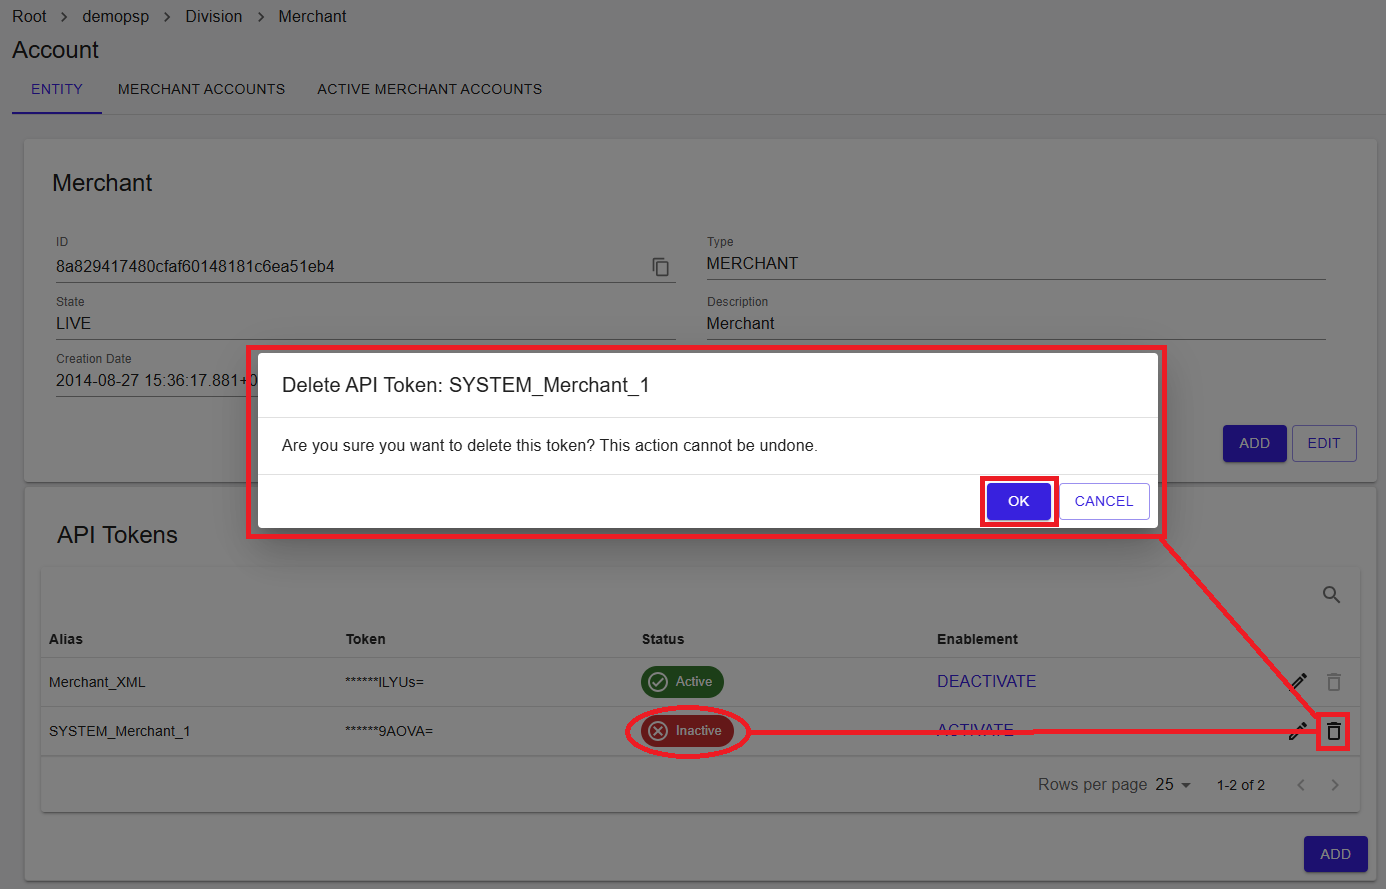
Delete API tokens
To delete a token, click Remove.
Tokens must be deactivated before they can be deleted.
⚠️ Deleting a token is permanent and cannot be undone.
Temporary tokens can be created and removed as needed, for example in testing or short-lived integration scenarios.
Figure 5: Delete API Token
Summary
The API Tokens feature enables secure and flexible API authentication at the merchant level. With support for multiple tokens, lifecycle control, and strict security constraints, it allows safe integration, testing, and operational continuity.