
Merchant Portal Quick Start Guide
Overview
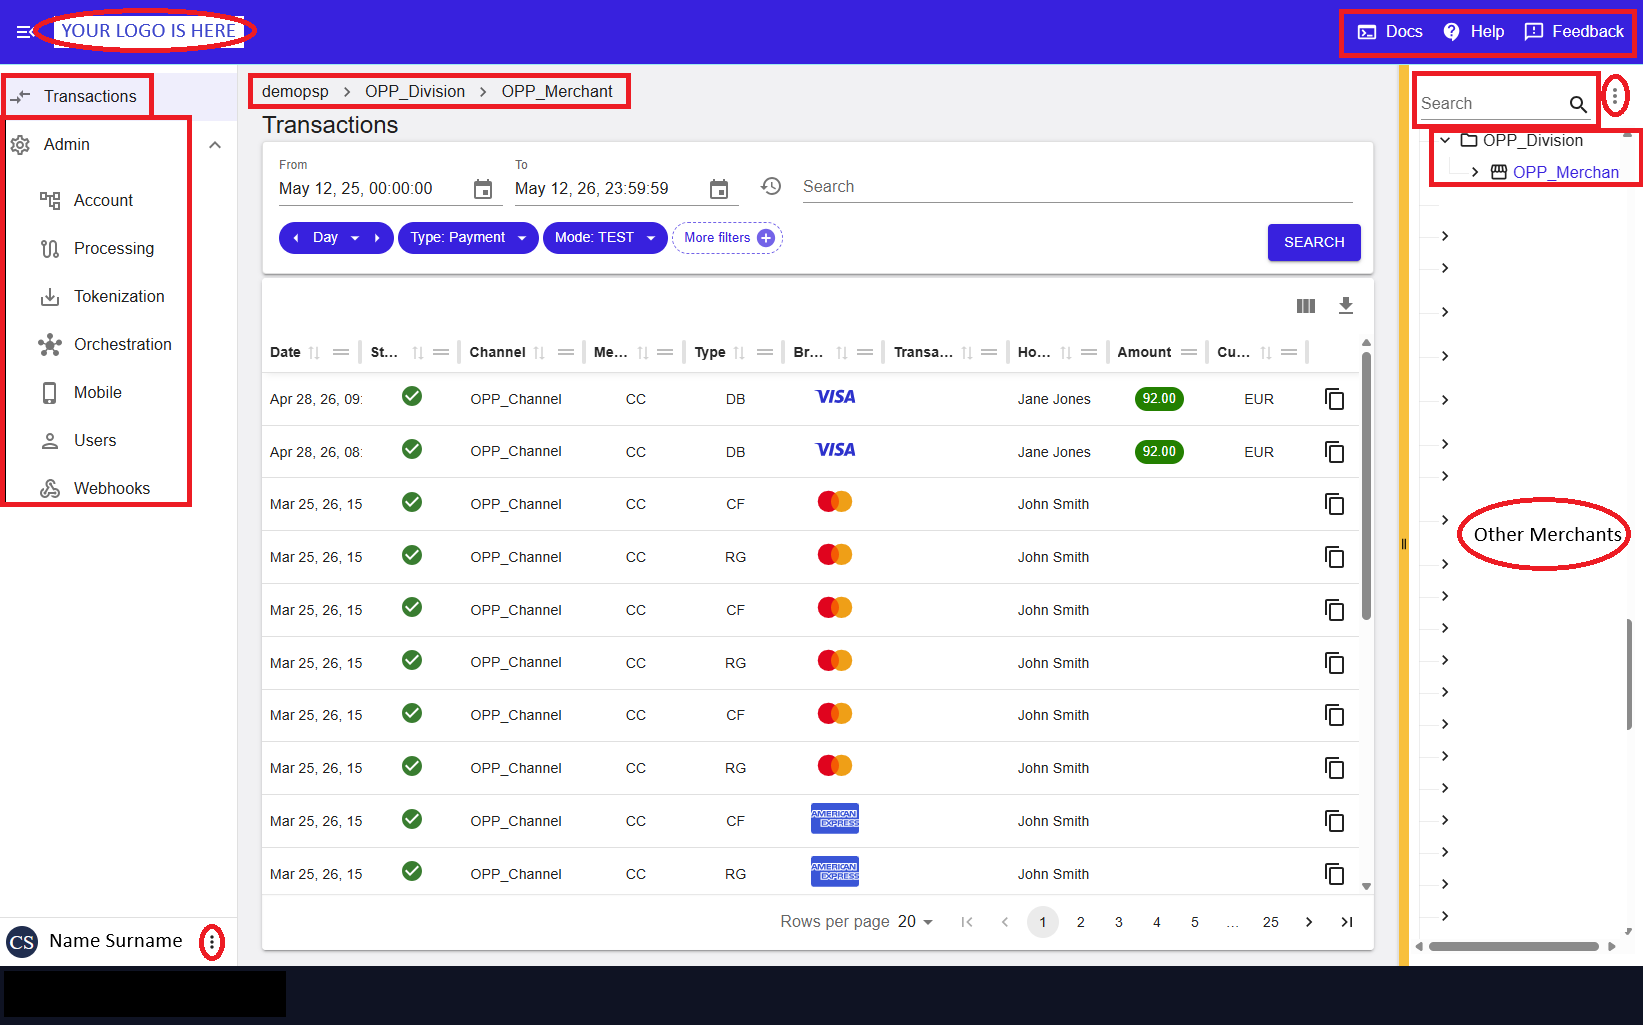
Figure 1: Merchant Portal – Account page overview
This Quick Start Guide helps you get started with the Merchant Portal by guiding you through the core onboarding flow:
Login → Secure access → Personalize → Configure → Operate
Each step builds on the previous one, taking you from first login to real transaction monitoring and operational activity.
For the full documentation entry point, see the Merchant Portal User Guide.
Before you begin
- Ensure you have access to the Merchant Portal.
- Confirm that your user role allows configuration and transaction access.
- Understand whether you are working at PSP, Division, Merchant, or Channel level.
Some settings may be visible but not editable, depending on your role and the selected hierarchy level.
Step 1 – Get oriented in the UI
Figure 2: Merchant Portal – Account page overview
After signing in, familiarize yourself with the Merchant Portal layout, navigation menu, and entity selection behavior.
For a detailed walkthrough of the interface elements, see User Interface Overview.
Step 2 – Complete Multi‑Factor Authentication (MFA)
Figure 3a: Enter username and password (1st factor)
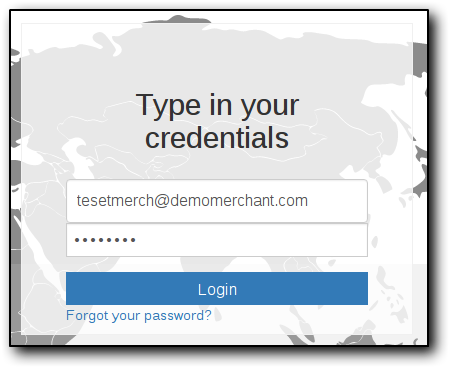
Figure 3b: Enter Google Authenticator token (2nd factor)

Multi‑Factor Authentication (MFA) protects your account by requiring a second sign‑in factor in addition to your password.
Admin users must complete MFA enrollment using a time‑based token generated on a mobile device. For setup and recovery options, see Multi‑Factor Authentication (MFA).
Step 3 – Update your user preferences
Figure 4: User profile and preferences panel
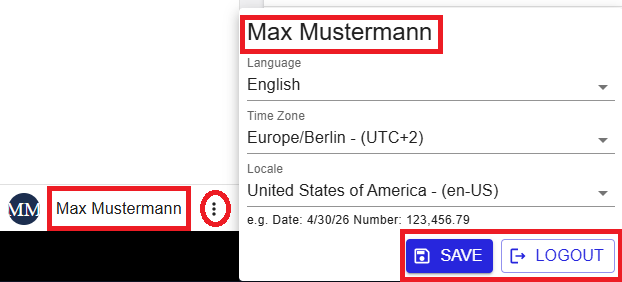
To ensure timestamps, formats, and language match your expectations, update your personal preferences before working with transactions.
You can configure language, time zone, and locale settings from your user profile. These settings affect transaction views, logs, and reports.
For full details, see User Profile and Preferences.
Step 4 – Select the correct entity scope
Figure 5: Account Tree with hierarchy, search, and controls
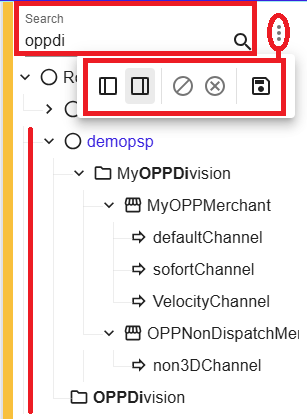
Configuration and transaction visibility depend on the entity selected in the Account Tree (PSP, Division, Merchant, or Channel).
Learn more about navigating and managing the hierarchy in Processing Account Configuration (Account Tree).
Step 5 – Create or update entities
Figure 6: Account – Entity (Merchant) view
Entities define the organizational and processing structure used throughout the Merchant Portal.
See the Account Tree documentation for entity creation, editing, and state management: Account Tree.
Step 6 – Create and configure Merchant Accounts
Figure 7: Merchant Accounts – list view
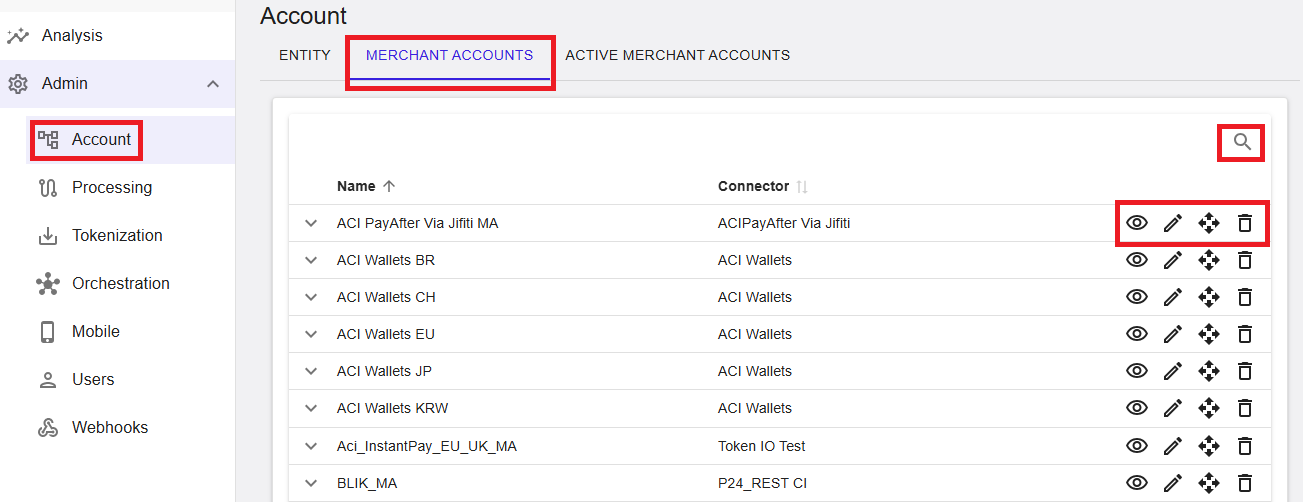
Merchant Accounts define how transactions are processed via specific connectors and credentials.
For configuration steps and lifecycle management, see Merchant Accounts Management .
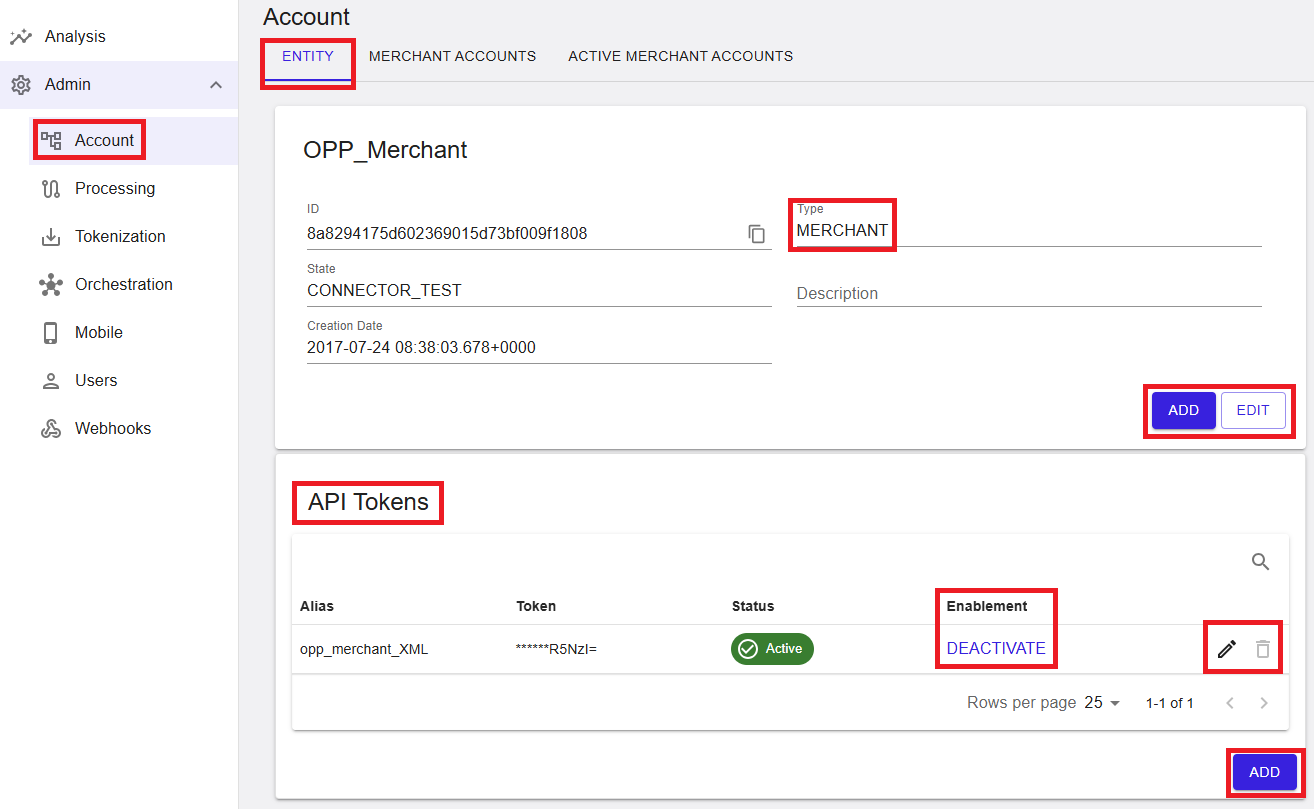
Step 7 – Manage API Tokens
Figure 8: API Tokens – merchant‑level token management
API Tokens authenticate API access and transaction processing. Tokens are shown only once after creation and must be stored securely.
Learn how to create, rotate, and deactivate tokens in API Tokens.
Step 8 – Review Processing configuration
Figure 9: Processing – landing page
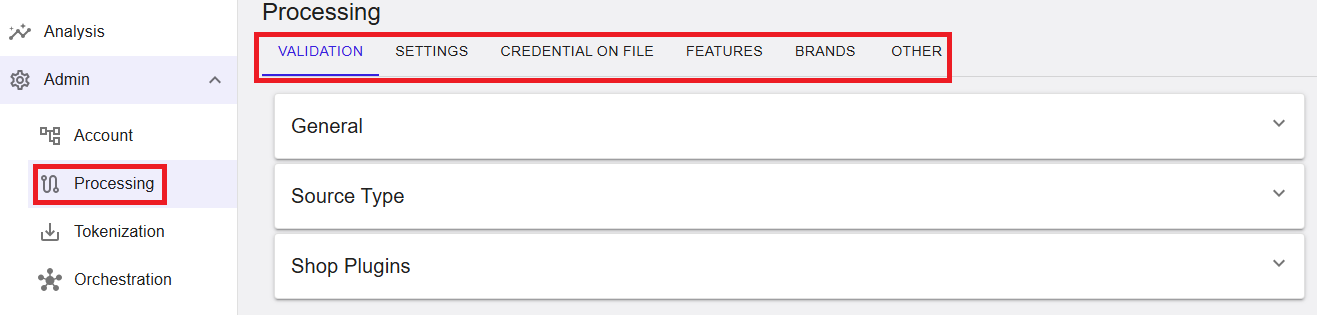
Review processing rules, credential handling, features, brands, and other options that influence how transactions are handled.
Start with the Processing Overview and navigate to the relevant sub‑sections as needed.
Step 9 – Find and review Transactions
Figure 10: Transactions – main list view

Use the Transactions view to search, filter, export, and analyze transaction activity.
See Transactions – Overview and Search Filters for detailed guidance.
Step 10 – Perform Back Office operations
Figure 11: Back Office Operations in Transaction Details
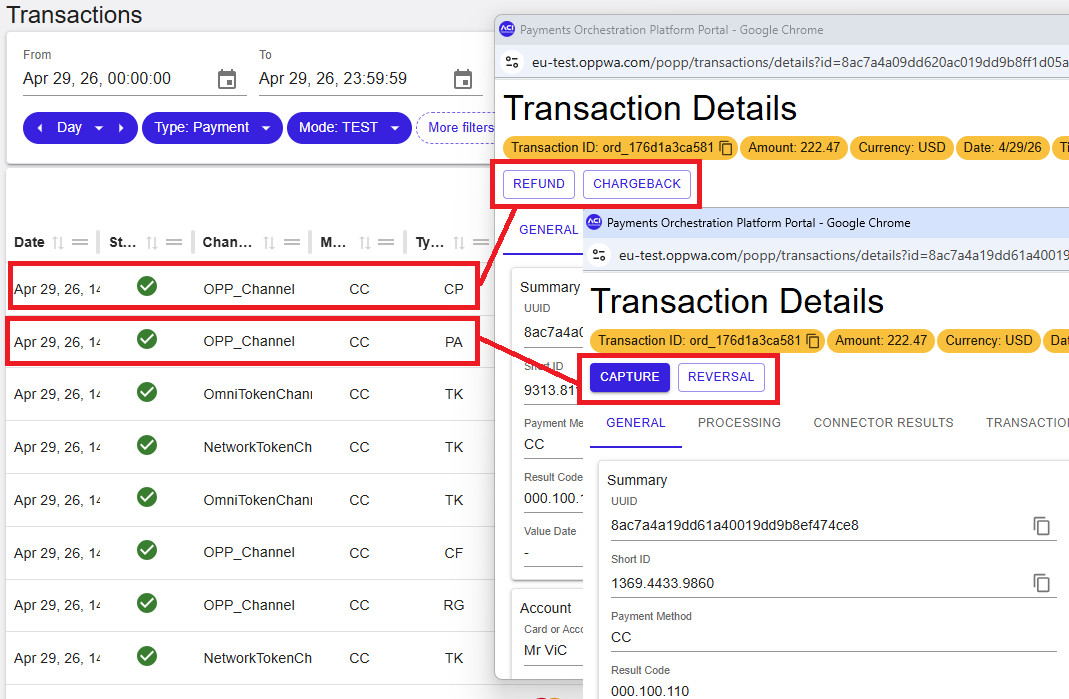
Back Office operations allow you to capture, refund, reverse, or rebuild transactions directly from the Transaction Details view.
Jump directly to the relevant section in Transaction Details – Back Office Operations .
Summary
By completing this Quick Start Guide, you followed the full onboarding flow:
Login → Secure access → Personalize → Configure → Operate
For advanced topics and detailed configuration, continue with the Merchant Portal User Guide.